March 24, 2023
Tips for Repotting Your Tropical Houseplants
“Excuse me, how long before this *insert tropical variety name* needs to be repotted?”
We get this question all the time, and depending on the particular plant our answer is usually “not for a while yet”. It’s a bit vague, yes, but it also means that you don’t need to worry about finding a larger home for your 4” Croton right away.
It’s easy to get excited about your new houseplants, and of course you want to give them the best home possible. So why not save some time and energy by putting that 4” Ficus into a 16” pot – it’ll grow into it, right? No, sorry, but that’s not how indoor houseplants work. Repotting Tropicals is like buying shoes for young kids: eventually they’ll need those size 13 sneakers, but not when they’re 4 years old.
Most Tropical houseplants like to be ‘pot bound’ and prefer to feel cozy in their homes. Too large of a pot means excess soil, which won’t dry out evenly which can then lead to root rot, dehydration, or both! That kind of stress also leaves your plant susceptible to insects, fungus, and diseases – eww! So it’s not a good idea to let your indoor houseplant “grow into” a pot that is far too large for their current size. The general rule is to increase by one or two pot sizes at a time: a 4” plant can go up to a 5” or 6” pot, and a 10” can comfortably live in a 12” pot.
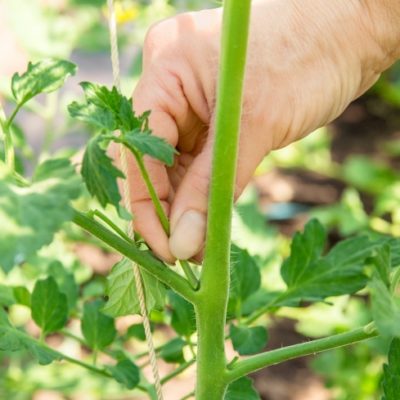
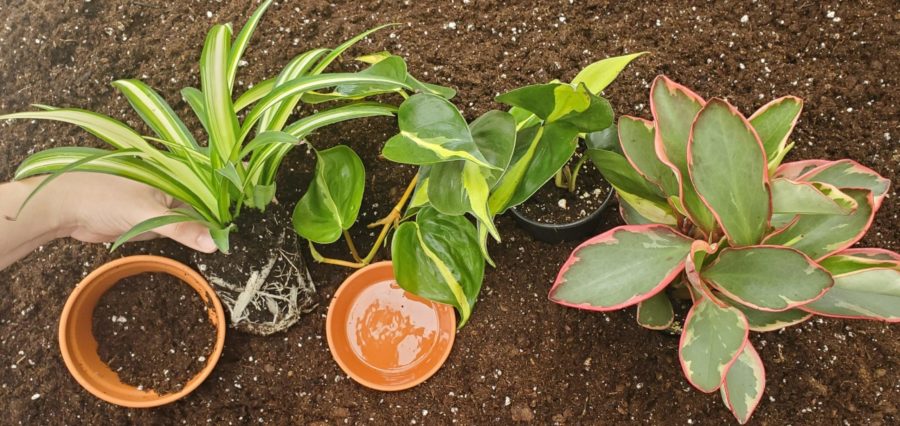
Your Tropical houseplant will let you know when it’s time to move up a pot size; their roots may be “popping” them out of their pots, or you discover that their soil is drying out much faster than usual. If you’re not sure, lay your plant down on some newspaper and ease it out of the pot – you may have to use the “wiggle” method, and we recommend calling a friend for help with larger plants. Once you’ve got it all out in the open, if you see more root than soil it’s time to go up a pot size; this is also a perfect time to check for any root issues like rot or dehydration.
Speaking of root issues, we always recommend a pot with drainage holes! Tropicals cannot be left to sit in water for too long, so having an exit point for excess water is incredibly beneficial for the plant’s overall health. Plus, you’ll be able to see exactly when your houseplant has had enough to drink – water running out of the drainage holes indicates that all the roots, from top to bottom, have gotten a good dose of moisture. If you’re not crazy about the look of plain nursery pots, you can place them inside slightly larger (and more attractive) pot covers, which don’t have drainage holes so you’ll have to remember to drain away any excess water.
One other thing you need when repotting your Tropicals: soil! Use good quality potting soil to give your indoor houseplants a good foundation in their new home. We carry a few different options, including one specifically for indoor potting needs, all of which are lightweight and allow for balanced water retention and drying. Do Not Use Garden Soil or other Outdoor Additives! They are way too heavy for container planting and will crush the roots.
Here are our tips for repotting your Tropical Houseplants that grow in potting soil. Check out our website and our other blogs for information on repotting Cacti, Succulents, Orchids, and Bonsai, which require different growing mediums.
Soil Notes: for Cacti, Succulents, and even Bonsai, we recommend Cactus potting soil which has sand added for increased drainage. Orchids do not grow in soil but in Orchid Potting Mix, a combination of chunky Coconut Coir and Bark; some brands add Lava Rock and/or Horticultural Charcoal to their mix. Sphagnum Moss can also be used for certain varieties of Orchids.
Repotting your Tropical Houseplant (in Potting Soil):
- Prepare your potting station! Select your new pot (with drainage), cover the working area with newspaper, and have your indoor potting soil ready; you may want a small scoop or large spoon to help with filling.
- Ease your plant out of its existing pot (see earlier mentions of the “wiggle” method) and take the time to inspect the roots for any damage or other issues. Use a clean knife or pruners to cut away any that are too far gone with dehydration or rot, but leave enough roots behind for the plant to live!
- If your Tropical is tightly root-bound, gently loosen the roots with your fingertips. There’s no need to remove all the soil from the roots, unless you see sufficient damage to those on the inside of the root coil.
- Add some soil to the bottom of your new pot, then gently hold your Tropical near its base and set it on top. If you’ve removed soil from the inside of the root coil, build up a tall hill of new potting mix for your plant to sit on; press your plant down lightly on the hill, ensuring roots are curled around the base and not crushed underneath the plant.
- Add or remove soil as needed until you’re happy with the soil height – stop a few centimeters from the rim of the pot to allow for watering.
- Once desired soil level is reached, keep hold of the plant’s base with one hand to keep it upright while using your other hand to add soil around the sides of the pot with your scoop/spoon. Gently pack soil into the crevices but do not compress too hard; you want the roots to be able to grow freely in their new home.
- Soil level should be consistent from the old pot to the new ; not higher or lower on the plant’s crown/stem. Lightly tap the sides and bottom to remove air pockets and settle soil level; add more potting soil if needed. Do Not Over Compact!
- Time to water! Using a watering can or very light pressure from a faucet, water all around your Tropical to moisten and settle the soil. Make sure to water until you see liquid flowing out of the drainage hole(s) and allow pot to drain into the sink.
- Put your newly repotted Tropical back in its original location in your home, and watch it thrive in its new home. Congratulations, you’ve repotted a Tropical Houseplant!
Post Views: 2,427